How to Restore a Wooden Cliffe Craft Boat – Marc Benoit style
by: Marc Benoit
In my first article, I related how I had discovered and lovingly repaired my first Cliffe Craft. I even met Charlie Cliffe, and his gracious hospitality was much appreciated. In my second article, I related some of my many excursions. And now, I will explain, step by step, how to refinish a wooden boat – my preference being a Cliffe Craft!
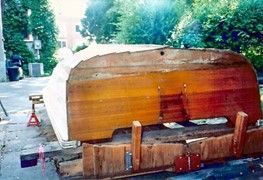
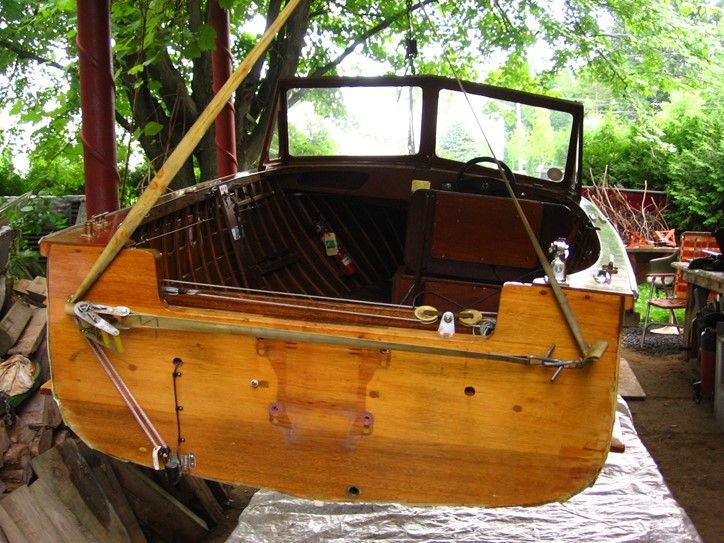
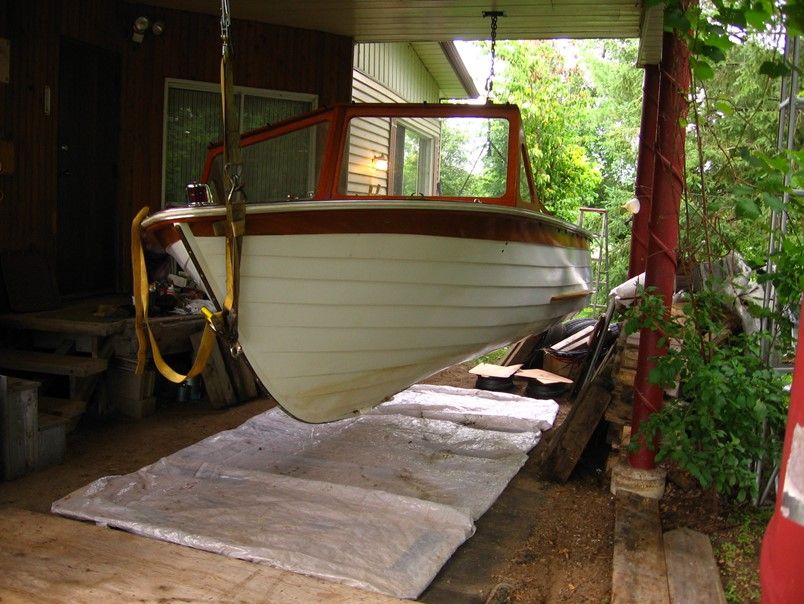
In 2014, another Cliffe Craft came along. A Cliffe Craft Skipper, 18-footer, in need of a lot of TLC! Since my shop is outside, it became a multi-season project. Three boats, even if they are Cliffe Crafts, are one or two too many! So, in 2014, the Dart was sold to a happy local wooden boat fan.
At this point, having restored three wooden boats inside and out, I’ve amassed some very useful and practical experience in boat restoration. So here I will share some of the important things that I have learned.

Fasteners:
All of Charlie Cliffe’s boats used top quality brass wood screws and machine screws of various lengths, with Robertson square sockets, mostly # 8, # 9, and # 10, with flat heads. These screws had a high copper content, but unfortunately none of them are available anymore. While restoring, the screws that are still good should be saved, after their sockets have been cleaned. The brass screws now available have flat slot heads and are just no good for the purpose, since they’re brittle and “break like biscuits!”
Removing brass fasteners stuck in caulking, glue, epoxy, or paint, whether in mahogany or white oak, can be a challenge, but they must be removed, during repairs when necessary. Brute force will go nowhere and will simply lead to a stripped or broken head. On my Islander, I had to remove about twenty # 12, four-inch Robertson galvanized steel screws from the gunwales, where they were frozen into the ribs by rust. I replaced them with the same size, but in brass.
The only way to remove these screws is to use indirect heat by means of an electric pen-like soldering iron of at least 40 watts capacity. The trick is to shape the tip (normally made of copper) into the shape of the screw head, then holding it still and heating it for about ten minutes. Patience and time are great allies.
Next, inserting a drive bit of the right size, and then hammering and turning with a vise-grip plier, should dislodge the culprits without breaking them. In general, while screwing in new, finish the last turns by hand, to get a feel for how tight it is and not strip the screw.
When drilling, use new or freshly sharpened drill bits for the exact drill size for the screws in use. A Drill Doctor machine can be very useful and save you money.
As a replacement for brass screws, Robertson Stainless steel wood screws are the best option. Don’t use screws intended for sheet metal, since they are threaded all the way up the shank and thus won’t pull the wood together in the right fashion.
It takes quite a bit of research to find the good stuff. Silicone bronze (SB) screws with Frearson, Phillips, or Robertson heads are available in boxes of 100 screws and aren’t cheap. I’ve found sources located in Canada, the US and Asia. SB screws are the top choice for wooden boats.
As for all those brass screws, the equivalent of three plastic peanut butter jars were extracted from the hull. That’s a few hundred screws!

Boat paint:
The main goal in painting a boat’s hull, beside esthetics, is to protect the precious wood from decay. A wide variety of products are available, at a wide array of prices. Some come with high promises of all sorts.
While beginning my boat ventures some 50 years ago, I was confused by all the choices offered on the shelves of boat and paint stores. Then I met an old-time shipwright/fisherman from the Gaspé Peninsula, who gave me this enduring advice. “Any good quality marine enamel paint will do the job and last a long time.” Period.
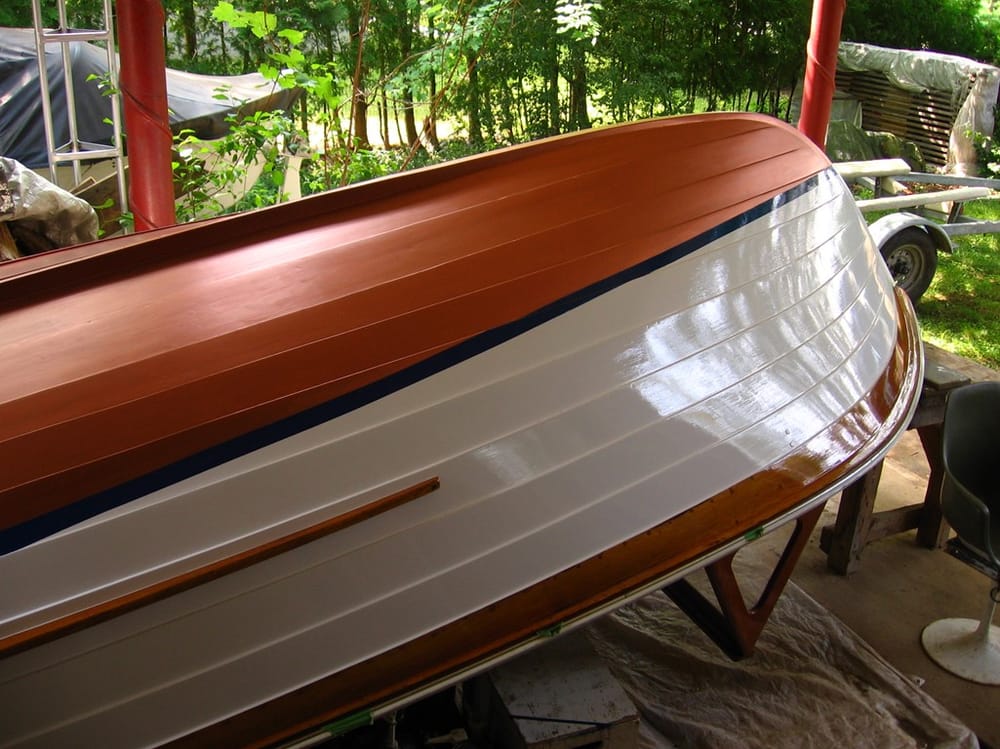
As always, the prep work is crucial and requires a perfect finish sanding. Then, use an oil-based primer, cut at 50 % for the first coat. When dry, apply a second coat at 25 %, followed by a third undiluted coat, sanding between the coats. Paint thinner like varsol is ok to use. Follow the same process with the marine enamel. This is what I’ve done on my Islander, Dart, and Skipper.

The final result is a very hard and glossy white finish that will last many years, if the boat is covered when not in use. As a rule of thumb, I refresh my paints after 8 years. It’s also important to properly dispose of paint, thinner, rags, masking tapes, and other materials used. Local recycling facilities can be helpful. Be aware of the health issues involved while sanding, painting, and stripping paints and varnishes. Proper masks, ventilation, and dust control are important. The smells and fumes are not welcome in any house or adjacent car port; these are health hazards.
Paint and varnish stripping is best done with an electrical heat gun with Richards scrapers (yellow & green handles) kept very sharp with a file. This is a two-person job. Masks are mandatory since lots of very toxic dust and particles will fly everywhere.

Varnishes & Stains:
In my experience, varnishes should be clear, glossy or not, and of the spar type. There are many brands to choose from at various prices and not just exclusively from boat stores. Four coats with a light sanding in between is the minimum for a real UV and water protection. Varnishes don’t last forever, a few seasons at the most, so it’s a perpetual dip in the varnish!
First quality varnish brushes are also a must. Equally, meticulous cleaning after use is mandatory.
As for stains, in the past, I have used oil-based stains with success. But it must be said that it isn’t compatible with epoxy coatings. Recently, I have been using water-based stains with satisfaction, which are epoxy compatible. Many shades are available and two or more colours can be mixed to create the colour desired. It gives good results on mahogany, either solid or ply, and it also dries quickly with no odours. Environmentally friendly products are available from SamaN International. [https://saman.ca/international/]
Once the job is finished, paint and varnish containers will store the left-over products, but they will decay even with a properly closed lid, due to presence of air on top of the liquid. The solution is to inject Argon gas from a can of Finish Preserver, available from Lee Valley. [https://www.leevalley.com/]
Boat wood:
On Cliffe Craft boats, mine and others, to the best of my knowledge, the only woods used were mahogany, solid or plywood, and solid white oak.
For strakes, okoume and meranti plywoods are available in various thicknesses and in 48” X 96“ sheets. Thus, it requires scarfing to make the needed lengths.
Meranti is stiffer than okoume, but both are appropriate and easy to work with. Caulking such as Sikaflex and others, will adhere very well to these plywoods. Speaking of caulking, I don’t know the brand that was used on my various Cliffe Crafts. But I can testify to their quality and long lasting elasticity since they have lasted for over 40 years of use!
Cliffe Craft boats, by their hull design, are meant to be dry. There is no need to swell them every spring. Charlie’s boats were built to keep you safe on the water and to keep water out of the hull. The worst enemy here is rainwater and water that lingers in the bilge.
So keep them dry. As for rain: get a good quality, waterproof tarp. It will pay.
Steam bending:
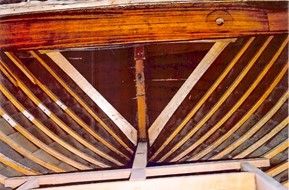
Ribs have to be cut to shape and length prior to steam bending.
In my experience, a stainless steel beer keg of a few liters makes a good boiler on a propane burner (50,000 BTU). Two lengths of copper tubing, 4 inches X 6 feet, with ABS union makes a good 12-foot-long steam chamber, for up to 6 ribs at a time. The ‘recipe’ is one hour of full steam for every inch of wood thickness. Once the wood is out of the steam, the time before going to its final destination in situ is extremely short – 60 seconds or less!!
It’s a rather fast, precise, job for two well prepared persons. In between boiler and steam chamber, various ABS elbows can be used to make a suitable link. It doesn’t need to be airtight. Remember, it’s the heat from the steam that makes the lignite in wood bendable, not the water. Steam temperature can and must reach a very high temperature to do its work.
A word of caution: Steam is extremely and dangerously hot. Wear proper apparel. No time for short sleeves or pants, bare feet, and bare hands. Losing heat because of wind or ambient temperatures will affect the results. Thus, be prepared to live through a sweat session in this unusual feat of working the bends of your hull. It’s a learning process.
To buy or not to buy an old wooden boat?
This is a topic I have often discussed with longtime friend and boating buddy, A.M. Bergeron, who has played a major role in my love for wooden boats, and who was also the founder of “Les Amateurs de Bateaux de Bois”, in Québec in the 1990’s.
The drive (urge?) to get one’s hands on a wooden boat can easily get out of proportion and good sense. Well before hand, there are several factors you must consider. Be realistic.
- Motivation: Old dream? Memories of an elderly loved one?
- Woodworking capacities and knowledge?
- Tools: there is no limit to how many $$$ this may represent.
- Time: what is available, after all the “chores of life” are taken care of.
This includes family – your “better half” and kids. After all, it is a hobby, no matter how great a passion it is for you. Be considerate. - Space: where to locate the project, inside or outside?
- Lone wolf or teamwork? It must be clear from the start who owns the boat.
- Initial expenditure: whatever the price tag, the money involved in restoration will represent the insurance value of the finished boat. These costs can vary greatly between provinces, so look into it.
- Storage: Marina in season? Off season? Front lawn? Car port?
Marinas, in most cases are a gathering of boat owners with varying degrees of conscience in regard to what is dumped overboard. Most are compliant, but . . .
While the docks offer running water and also electrical power (AC 120 V), it might find a way to leak to ground (water), which possibly may result in galvanic corrosion. Probably wise to raise your outboard motor above the water, so it doesn’t funtion as a ground. - Marine products: paint, varnish, fasteners, engines, hardware, wood, epoxy, solvents, caulking, electronic equipment, insurance (annual fee + the survey, every three to four years), the boat trailer and its many details.
Engaging in the restoration of a “vintage” wooden boat of any size can be a tremendous learning but also a very expensive experience. It can be a serious “money pit”!
All aspects of restoration open many windows of knowledge in the process. One may be surprised to learn a great deal of history on various subject related to builders, designers, navigation, boats, and boating. Knowledge is gold. One thing is certain, the finished boat will increase the pride and self-esteem of its restorer.
And with some regular maintenance, your boat will last and last. As for myself, of course I take pride in my work, but as well, I am a strong advocate of small is beautiful. My motto is a clean ride, low noise, low speed, and no trace. In this sense, wooden boats are perfect tools.
It is certain that wooden boat restoration is guaranteed to make you buy lots of stuff. For myself, I try my best to buy locally and in Canada. Buying locally reduces transportation and pollution (carbon footprint) and gives the local stores & people a fair chance to keep their business alive and well. But, I agree, it isn’t always feasible.
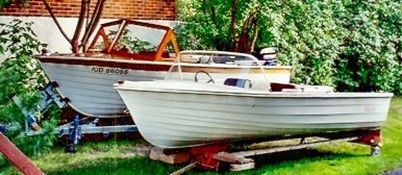
Storing my wooden boats
All my wooden boats live high and dry on their trailers, covered with tarps when not in use, year-round. Good waterproof fabric tarps are the best option if no inside, unheated space is available. Shrink wraps are of questionable value, especially after their use since they are not re-usable and create one more un-recyclable piece of junk in the garbage dumps. One thing is for sure, these wraps aren’t meant to breathe, so moisture stays inside and won’t keep wooden boats really dry and dry-rot free.
Cliffe Craft crests
If broken or lost, there is a solution to missing crests. A 3-D printer can make you one. Twenty years ago, I managed to have a silicone mould made and then poured white coloured epoxy in it. Once hardened, I carefully rolled red enamel on the top. Exact replica! Necessity is the mother of invention! Sounds like Frank Zappa!
By Marc Benoit
Born in Montréal in 1951, Marc has a broad spectrum of interests fueled by his past studies and experiences in music, plastic technologies, artist management, and restoring violins. He has been a full-time musician touring North America for over 50 years, being active in the folk milieu in Ontario and the rest of Canada for two decades. For a time, his music was produced by the late Stan Rogers. Marc's knowledge of wooden boats serves him well through his appetite to enjoy being on the water, discovering sights and scenes and yes, messing about with boats!
Be sure to see Marc's other Cliffe Craft articles.
• February 2002: Cliffe Craft Revisited
• March 2002: Excursions with my Cliffe Craft